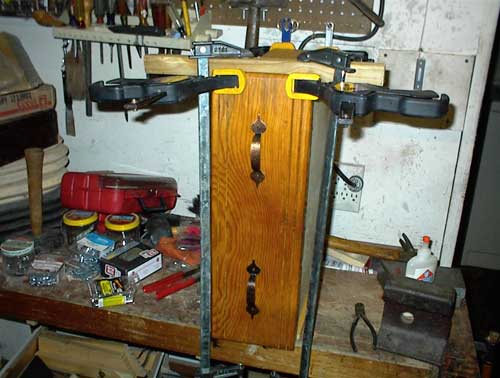
| Almost all of the five drawers need some repair. Here I'm re-attaching the front face
of one of the bigger drawers that sit under the stove. |
 |
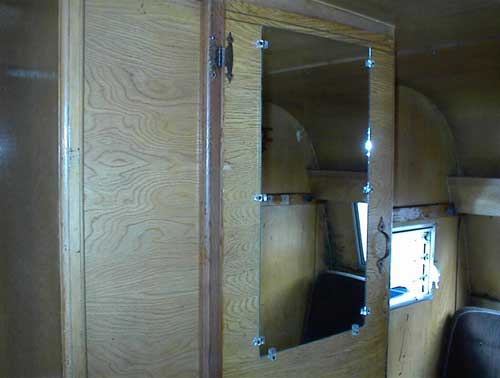
| A local glass shop was able to get me a new mirror for the closet door for under $10.00 |
 |
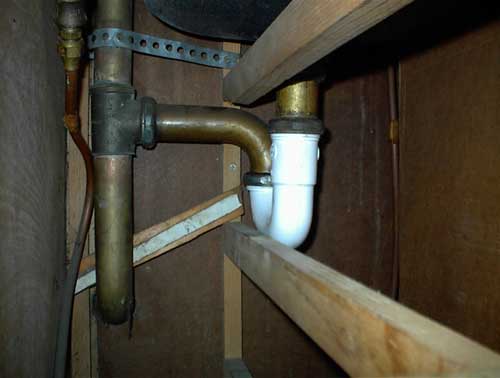
| The J-bend under the sink was allowed to go through the winter with water in it and broke.
I'll have to remember to get the water out of the new plastic one before the snows hit. |
 |
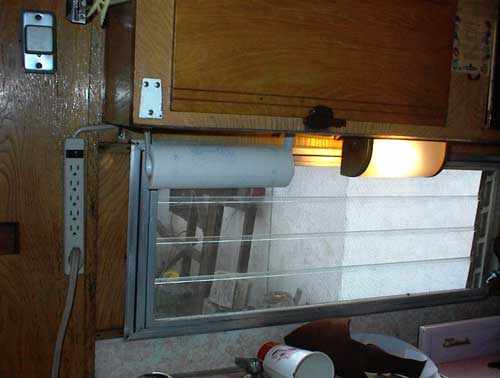
| There was an old 2-prong outlet here so I replaced with the three pronged power strip.
Thankfully the ground wire had been run to the fixtures in the camper. The white diffuser over the
light was fabricated out of a flexible cutting board. It doesn't match the original one that is
still present in the light above the dinette. |
 |
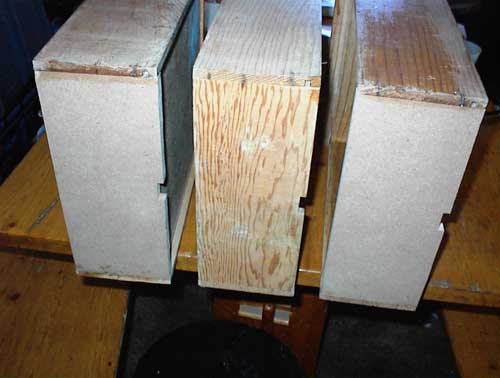
| Two of the three small drawers were broken and needed to have their backs replaced. I used
the one good drawer for a pattern and made new backs out of half inch MDF (medium density fiberboard). |
 |
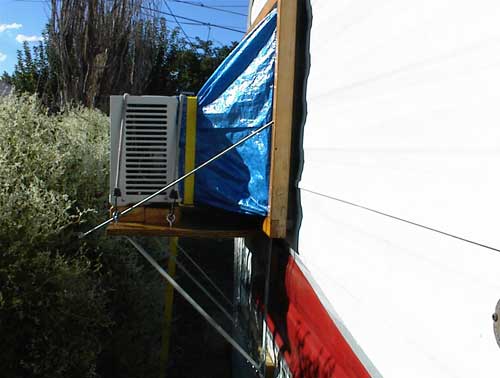
| Here is the A/C setup. The tarp was cut and sewn to make a shroud and it was stapled to the
wooden frame that surrounds the window. Two threaded rods with wingnuts hold the shroud frame tight
to the window compressing foam weatherstripping to seal it pretty well. I thought this was an
ingeneous setup but alas, the Siesta has almost no insulation and the 5000BTU window unit will not
cool it enough on a hot day. Swing and a miss. |
 |
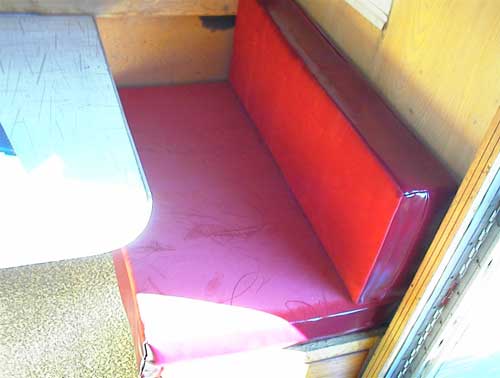
| The truck cushions were cut down and new one inch foam was glued to each side. The cushion
covers were sewn by my girlfriend using red naugahyde and velvet. Original cushions for the Siesta
would have had a wooden backing that provided support when the dinette was turned into a bed. Unlike
current campers, the table is not large enough to make the deck for the bed--it would have simply sat
on the floor between the benches and slats placed across for the cushions to lay on. I'm still trying
to figure out how I'm going to jerryrig the table to work as the bed platform. |
 |
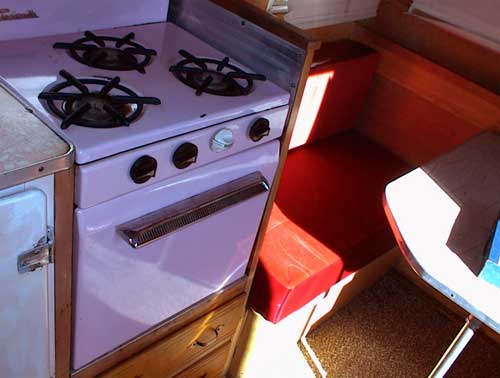
| I cleaned and reinstalled the pink Cinderella stove but have not attached a propane line to
it. I need to test the propane line and get a new, current tank before I'll be using the stove. I'm
wishing that there wasn't a chip in the pink enamel on the stove. You can see that one of the former
owners of the camper attempted to paint the icebox white covering up the cool pink. I'm hoping I'll be
able to strip that white paint off to uncover the original color. |
 |
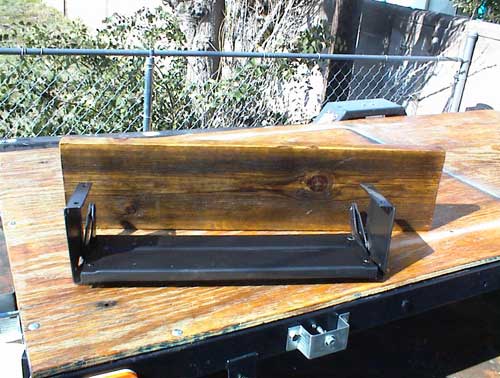
| I purchased this fold-out step off of eBay. It came primed and I painted with the same hammered
texture paint I used on the tongue. The mounting holes didn't match up to anything usable
under the trailer so I fashioned a mounting plate out of some 2x8 wood which I've given three coats
of exterior spar urethane. |
 |
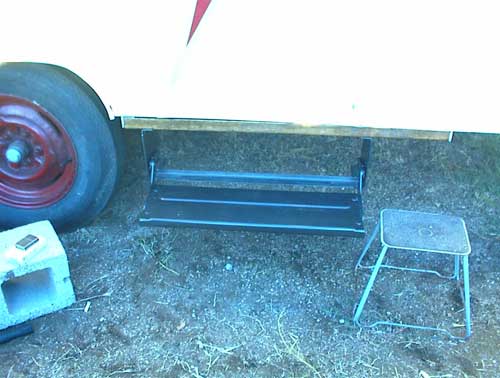
| Here is the step installed as well as the vintage stool that came with the trailer. The wood
provided a good mounting spot and doesn't look too horrible. |
 |