|
| Back to Sam's Teardrop Page |
The one notable flaw in the Chevallero was the soft spot on the floor in front of the sink. The flaw was disclosed by the previous owner who didn't think it would be a big deal to fix. Murphy's Law said otherwise. Here are the details of how I fixed the floor. Note that in fixing the floor I came across a small section of bright yellow shag carpet which was probably the original floor covering. What were we thinking back in the 1970s?
| The "soft spot" in front of the sink turned out to be much worse than expected. The entire carpeting in this area was soaking wet and the floor was trashed, probably from being wet for years. | 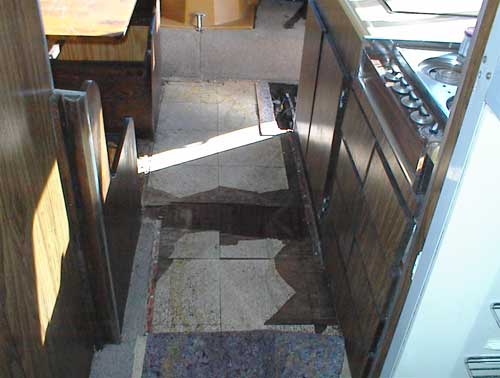 |
| I ended up tearing up all the carpet in the coach. There was another bad spot in front of the fridge. Not as bad as up front but will still need work. My initial thought was to simply cover the entire floor with 1/4 inch or 3/8 inch plywood but worried that the floor would still be spongy and I would have just added 75 pounds of weight that the coach didn't need to carry around. |  |
| After counting out the idea to recover the entire floor it looked like I would be able to simply chip off the upper layers of plywood where it had delaminated and replace with a thinner piece. I chipped for a long time. | 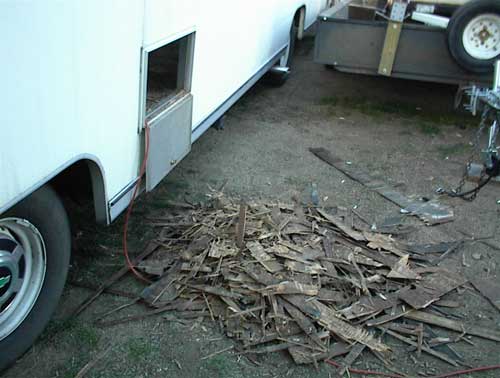 |
| In the end I decided to simply remove the plywood completely. Here is the aluminum underfloor skin after removing the plywood and the green foam insulation. The wood that runs down the center of the floor stops mysteriously about eight inches from the front of the coach. | 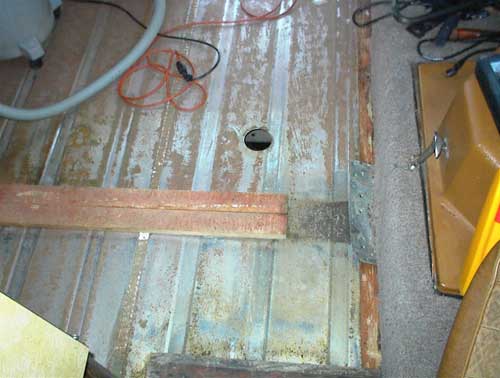 |
| That hole shown in the picture above, along with another two feet behind it (patched) show that my coach had the optional L-Dinette set. At some point in its life the dinette was replaced with a homemade plywood one currently present. | 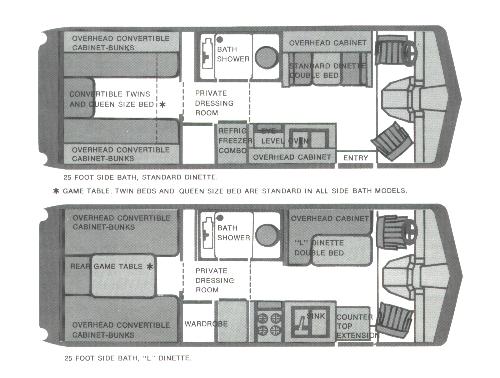 |
| Here's a look at the floor after I cut the rotted plywood out. I'm replacing about 42 square feet of plywood. I first thought it was 3/4 inch plywood but it turned out to be 1/2 inch--horribly delaminated in front of the sink. | 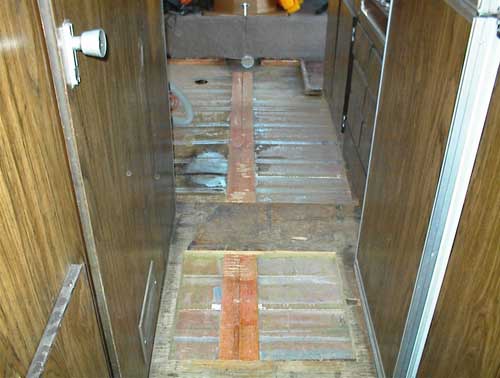 |
| The burn mark on the aluminum underfloor is a spot where the exhaust comes too close underneath. There are screws protruding through showing that a heat shield was added at some point but the green foam insulation was actually quite burnt. | 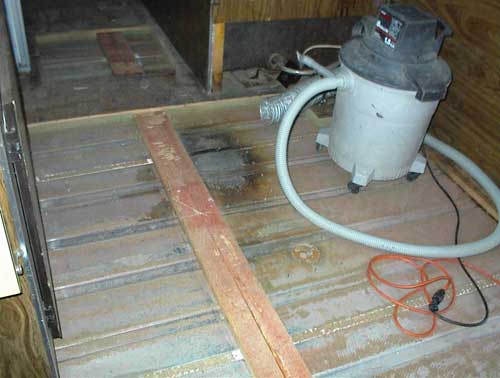 |
|
| |
| I glued two pieces of half inch plywood to make one inch edging that was put under the existing floor (after scraping out some of the green foam) and glued/screwed in place. This gave a good surface to glue and screw the new plywood decking. | 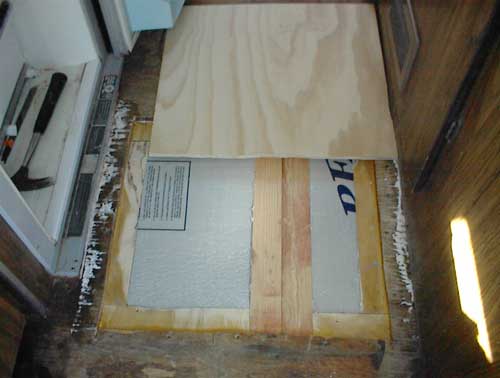 |
| Here is the completed patch in front of the fridge. I used lots of Gorilla Glue and screws to hold the new flooring in place. If it looks like the edges of the plywood are wet it's because they are--Gorilla Glue requires that the surfaces be wetted for maximum bond. | 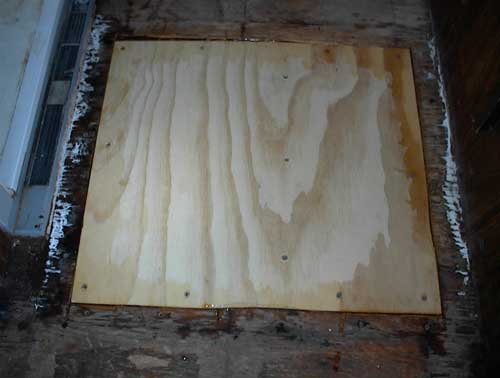 |
| The wood running down the middle of the floor was two pieces of 1x3 inch wood (actual dimension) that sat side by side. I used biscuits to join the wood together into a single six inch piece. The new triangular piece was also joined in the same manner and homemade aluminum angle brackets were added to reinforce. | 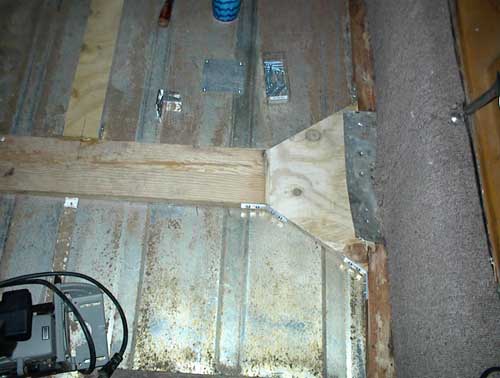 |
| One inch rigid foam insulation takes place of the original green "floral foam". The rectangular piece at left is half-inch foil lined insulation that covers two layers of 1/4 inch concrete backer board. This should provide protection against the heat of the "too close" exhaust element--no more burned foam. | 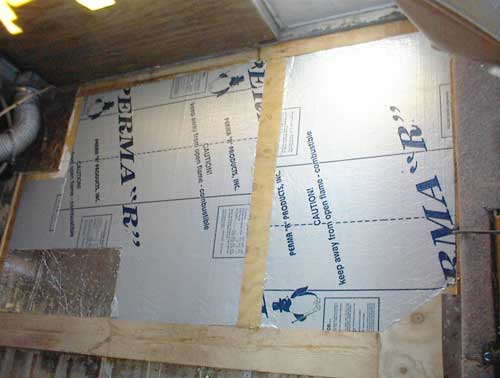 |
| Here is the largest piece of plywood, approximately 4x6 feet. Lots of Gorilla Glue and screws to hold it down. This large expanse gives a bit under my weight, something I'd worry about except that the dinette will be screwed to the plywood and folks won't actually be walking on it. |  |
| The remaining front plywood shown with the old battery hatch cover. | 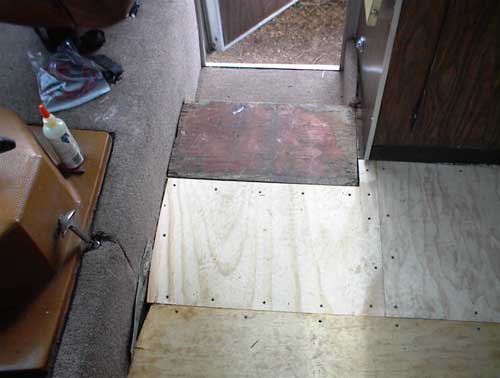 |
| The new battery hatch was made from two pieces of 3/4 inch plywood heavily glued and screwed together. You can also see some of the patching of screw holes and seams. | 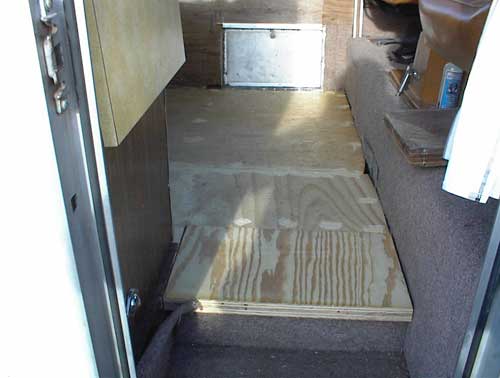 |
|
| |
| Lots of patching and sanding was needed to get the floor smooth and even enough to put the new flooring down. | 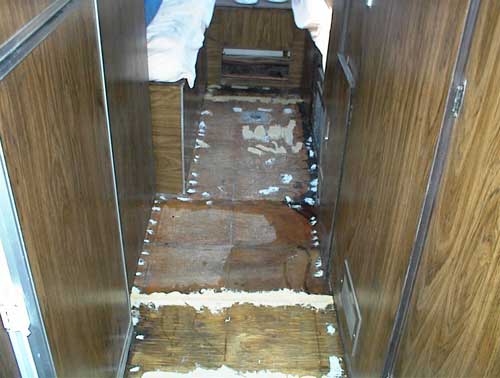 |
| Two coats of gray oil-based deck paint should give a good surface for the self-stick vinyl tiles I plan to lay. | 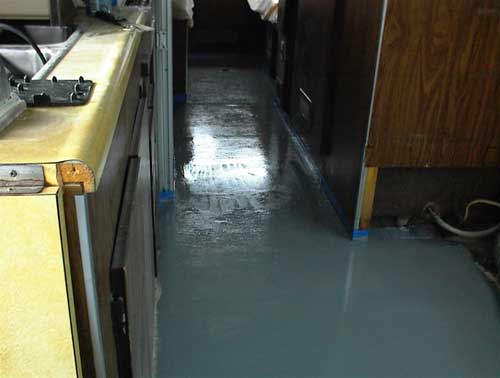 |
| My hot girlfriend helping lay the new vinyl floor. Looking good! The floor isn't bad either. | 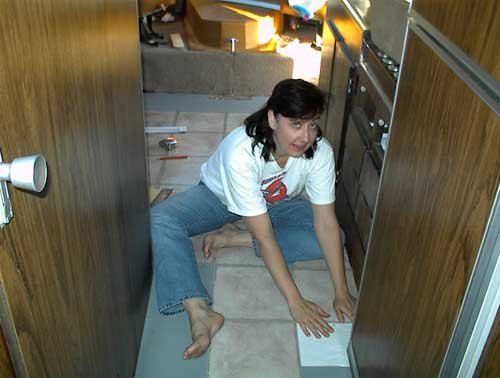 |
| Piecing in the rear flooring. I was tickled to death to see the rear table holder when I first pulled out the carpet. I have the small table that can go between the beds. | 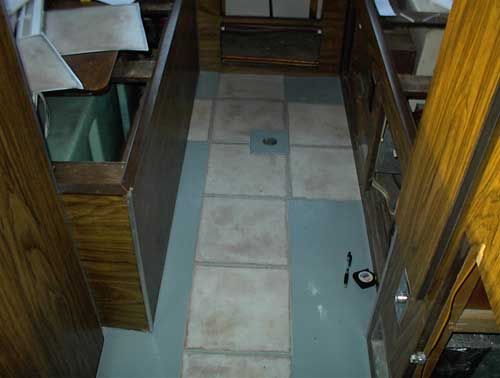 |
| I think the floor came out really nice. The tile came from Home Depot and was on drastic closeout, $.20/foot or $18.00 for the entire floor. Since we had so much tile we even tiled the shelves in the undersink cabinet. | 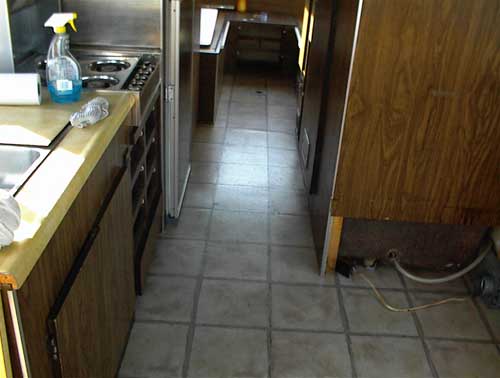 |
| Here is my treatment of the battery hatch. It is now hinged and stays in place rather than simply being lifted off. Haven't yet used the "Goo Gone" to get rid of excess adhesive at the tile seams in this photo. |  |
| One more look at the new floor facing the front of the coach. Haven't yet reinstalled the dinette. I plan to add moulding along the edges of the floor to keep the vinyl tiles from lifting and to give a cleaner look where we didn't cut so straight. | 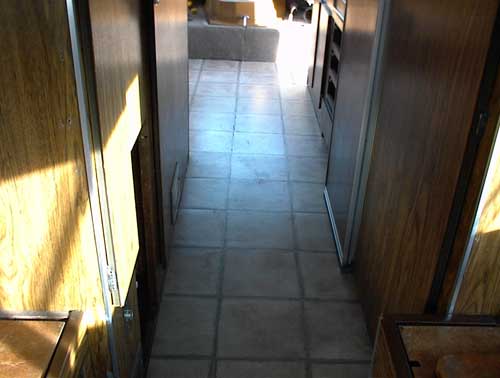 |
| On 4/6/04 the toybox was: |
Contact me: Sam Cancilla, sam@samstoybox.com.
Last Modified: May 23, 2006
Copyright © 2006 Sam Cancilla. ĀAll Rights Reserved Worldwide.